DWG Film LUTs
Film print–inspired looks crafted specifically for DaVinci Wide Gamut — cleaner hues, smoother highlight roll-off, and consistent results across Sony, Blackmagic, DJI, Canon, Fuji… anything that lands in your DWG pipeline.
DWG-first
Skin-tone safe
Cross-camera consistent
Film-like density
Most “film” LUTs are made for Rec.709 and hope for the best. These aren’t. They’re tuned natively to DaVinci Wide Gamut / DaVinci Intermediate, so your color lives in the right space from the start — and your Output Transform behaves.
Why these stand out
- Native to DWG. No janky conversions. Each LUT is tuned for Wide Gamut/Intermediate so it plays nice with your ODT and preserves hue separation.
- Skin-tone sane. Gentle contrast shaping and restrained hue bias so faces stay human — not pumpkin.
- Cross-camera consistent. Designed and tested on mixed footage inside a DWG workflow for repeatable results.
- Film-like density, modern control. Subtle shoulder, honest blacks, and color depth that lets you grade further without falling apart.
How to use (DWG pipeline)
Color Managed (DaVinci YRGB Color Managed): Place the LUT before your Output Transform (ODT) — working space Timeline: DWG / DaVinci Intermediate.
Non-managed (DaVinci YRGB): Use a DWG timeline + CST nodes. Apply the LUT on a node in DWG/Intermediate (before your final CST to Rec.709 2.4/2.2).
Tip: Treat the LUT as your creative look. Do WB/exposure and shaping into it; add grain/halation after it. Start at 50–80% mix.
Perfect for
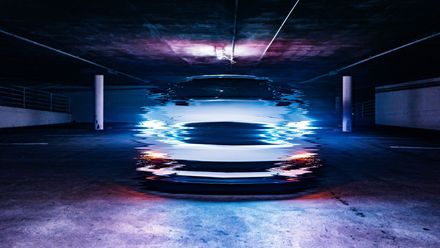
Cinematic narrative, travel, weddings, brand films - any project where you want true filmic density and honest color that still feels modern.
Specs & compatibility
- 7 ×
.cube LUTs optimized for DaVinci Wide Gamut / DaVinci Intermediate
- Works in DaVinci Resolve 17+ (tested in 18–19)
- Plays nicely with DWG or ACES pipelines
- Install: Preferences → Color Management → Open LUT Folder → drop in → Update Lists
Good to know
Creative LUTs, not technical transforms. Keep your ODT/CST in place.
Expose well (protect highlights) to get that film shoulder without crunchy whites. Make your grade feel finished the moment you toggle it on — without fighting your pipeline.
Built for real work
- Designed with feedback from working Hollywood colorists
- Skin-tone and highlight stress-tested