$14.99
Super Deep Cinematic Greens PowerGrade
Super Deep Greens — Cinematic PowerGrade
Take your color to the next level with a PowerGrade tuned for rich, natural greens, clean skin tones, and a modern filmic curve. Drag-and-drop, tweak a few controls, and ship a high-end look without hours of node surgery.
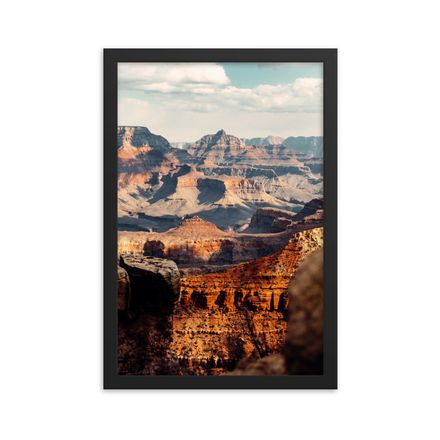
Whether you’re going for moody forestry, travel vibes, weddings in the wild, or brand films outside, Super Deep Greens gives you lush foliage without cartoon neon, plus gentle highlight roll-off and believable skin. Built for speed and consistency across cameras.
Highlights
- Deep, natural foliage: pushes greens toward rich, grounded hues while keeping leaves detailed (no plastic mush).
- Skin-tone sane: restrained hue bias & gentle contrast so faces stay human next to saturated greens.
- Filmic density & roll-off: subtle shoulder, honest blacks, and a curve that grades further without breaking.
- Cross-camera consistent: works on Sony, Blackmagic, Canon, Fuji, DJI—Log, RAW, or SDR.
- Fast: designed to sit in a modern DWG pipeline with minimal slider moves.
What’s inside
- 1 ×
.drxPowerGrade: Super Deep Greens
Node map (at a glance)
- CAM→REC709 (Input Transform) — set your camera Input Color Space/Gamma here (see workflow below).
- WB & Exposure — balance, contrast, and global saturation.
- Greens Shaping — foliage hue/contrast separation with protection for skin.
- Skintone Isolator — gentle secondaries to keep faces clean next to rich foliage.
- Filmic Curve & Roll-off — subtle shoulder/black shaping for density.
- Texture (optional) — grain/halation placement points.
- Output (CST / ODT) — keep your project’s ODT or CST here.
Node labels may vary slightly across Resolve versions; functionality remains the same.
How to use (by pipeline)
Recommended Project Settings
- Timeline Color Space: DaVinci Wide Gamut / DaVinci Intermediate
- Output Color Space: Rec.709 (Gamma 2.4/2.2)
Color Managed (DaVinci YRGB Color Managed / DWG):
- Drop the PowerGrade on your clip/timeline node tree.
- In the first node (labelled “CAM→REC709”), set Input Color Space/Gamma to your camera, and set Output to DaVinci Wide Gamut / DaVinci Intermediate so it stays in working space.
- Do WB/Exposure, then finesse Greens Shaping and Skintone Isolator to taste.
- Keep your project’s Output Transform (ODT) as-is.
Non-managed (DaVinci YRGB):
- Use a DWG timeline if possible, or stay in Rec.709 2.4.
- In the first node, set Input to your camera and Output to Rec.709 / Gamma 2.4 (or your preferred display space).
- Place a final CST at the end if you want to deliver a different space.
ACES (cc/ap1):
- Project in ACEScct / AP1. Keep the PowerGrade in the creative section before the ACES ODT.
- In the first node, use IDT-style input or CST to map from camera into ACEScct/AP1 (avoid double transforms).
Tip: Start with a conservative mix on curve/greens nodes; the look is designed to stack gently with your base balance.
Quick start (60 seconds)
- Balance exposure & white balance first.
- Apply the Super Deep Greens PowerGrade.
- In the first CAM→REC709 node, choose your camera’s Input (and set Output per your pipeline above).
- Adjust Greens Shaping and Skintone Isolator to taste.
- Optional: add grain/halation after the creative nodes.
Install
- Open the Color page → Gallery (top-left).
- Select the PowerGrade album (or right-click left column → Create PowerGrade Album).
- Right-click inside the album column → Import → choose the downloaded
.drxfile. - Drag the still onto your node tree to apply.
Compatibility
- DaVinci Resolve 18+ (Studio or Free)
- Works with Log, RAW, and standard SDR footage
- macOS & Windows
License & notes
© All Rights Reserved — Jamie Fenn. Not for resale or sharing. No refunds.
If you want to share, please use the original link to this page. Not affiliated with or endorsed by Blackmagic Design.